Browse Author: biserx

Chasing the Sun

Recently, I posted this photo to my Instagram account.

Unexpectedly, some media shared the photo, and soon enough it went viral. Well, mabye better to say “locally viral”. But at the same speed, comments like “it’s fake” and “it’s photoshoped” arrived. Tbh, I didn’t care much. There was something in that feeling of having my own 5 minutes of fame, that made me want enjoy the moment, and not to get into dispute with these who doubt. But at the same time, I understood them. I also couldn’t believe with my own eyes when I saw that yellow blob on the back screen of my camera.

Anyway, what I want to share here, is the process I went through before I made this shot. And it starts way before I clicked the shutter button for the pic above.

Intro

Last autumn I decided to challange myself and to improove my photography. For two weeks, every morning before job, I was wandering around the city, looking for inspiration. Couple days into explorations, and I figured out that it was the period of the year, perfect for foggy mornings, so I focused my exploration to the areas around water.

But not every location “behaved” the same way, so I started thinking more about where exactly the sun will rise, what are the weather conditions, temperature in the morning etc. I made some shots I was happy about and then the winter came. My beautiful mornings with a golden sunrise were over, but the experience of searching for a perfect location stayed.

Searching for a location

This part is about finding a potential spot for making a nice morning photo. It also applies for shooting a sunset though.

The sun does not rise exactly on the East. Tools like suncalc.org or Android app Golden Hour can show where exactly (azimuth value) the sun is rising (and setting) on a given date, relative to some point on the map. You can use this info to visualise the scenery if you are familiar with it, or to make some predictions at least if you are not.
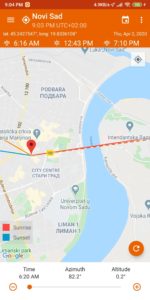
Golden Hour app, showing a position of the sunrise on April 2nd

For example, if I want to shoot a famous “house on drina river“, using the mentioned tools, I can at least have an idea how the result photo will look like, and that, if I want to see the sun setting down behind the house, I need to be there probably in January.

Having the above on my mind, somewhere at the beginning of the year I did a homework and ‘scanned’ the city I live in (Novi Sad, Serbia) for the sun alignments with some landmarks, streets, buildings.. I am familiar with the surroundings so it was easy for me to visualise the result. One boulevard that I found pretty interesting is straight for one kilometer, ends with a bridge, and at some point the sun will rise just “behind” that bridge. That seemed cool in my head and I noted that date. April the 2nd.

Exploring the location

I went to check the location about month before and it wasn’t anything special. Here’s the proof below, made later though. I was also disapointed because the bridge was invisible because of the distance. Lucky me, I had a Nikon 200-500mm collecting dust, and considering that, the idea seemed feasible.

Same location, nothing special

While exploring the location, I thought about where I want to ‘put the sun’ on my photo. I thought it would be cool to put it ‘on top of the bridge’. But to be very precise and to have the sun “click” at the top, you need have it at the exact altitude. Apps like Dioptra can give you aproximate value, but there is an error. Mostly due sensors imperfections in your phone.
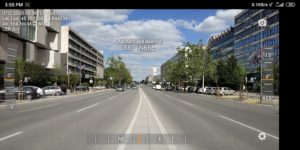
The target was set on top of the bridge, and the altitude value (on the right) is 1.8 degrees.

For example, the altitude value above is 1.8°, but sun’s altitude on April 2nd when I took the photo was 0.2°. Azimuth value (66°) also differ from the one in Golden Hour application or Suncalc.org (82.2°). So take these values with caution. If you are able do the some math on the paper, based on the altitude of the object where you want to ‘place’ the sun, and the distance. Simple arctan function will do.

Before the D-day, check the weather

On some other occasions I was waking up really early, driving couple hours to get to the location, just to see clouds. So check what the local weather predicion is saying.

D-day, be there early and setup your equipment

You want to be there at leas half an hour early. You will need some time to unpack your gear, to setup the tripod, take test shots. Check different framings, change positions. You don’t want someone else to take your perfect spot.

Set correct exposure, ISO, aperature. Keep in mind that as the sun goes up (or down) the ammount of the light changes drastically, and you need to update your settings accordingly. But at least have some initial settings set.
Try to decide what you want to achieve. My reasoning was that I will be shooting right into the sun, so I was afraid of having too dark and too bright areas on the photo. I was bracketing with +/-2 exp for that reason. Also, there was traffic going around, and I thinked about the postprocessing, so I made multiple shots, just so I have material to erase a car that I don’t like later.

Wait for the right moment

It’s easy to say. As I was shooting straight to the sun, I was watching the frame in live view mode (if you are shooting directly into the sun, with 500mm, you probably don’t want to look through the viewfinder). When I actually saw with my bare eyes this big yellow blob “moving” on a LCD (totally unexpected), I lost my mind a little bit. At that point the sun was still to the left of the bridge and quite below, but it was impression. I started shooting way before the right moment, in a fear that I will miss something.

Take that shot

When the sun parked between the light poles on the bridge, I knew I had the shot. But I continued shooting more material (for the purpose of removing cars if needed).
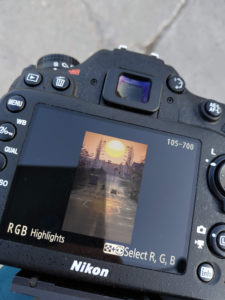
Go home, and take some more sleep probably..

At this point, this tutorial ends.

Bonus: Photo ‘aftermath’ for the suspicious

As I already said, I had no idea that the sun is going to be that big. I was amazed! People who didn’t witnessed this scene are suspicious. And I understand them. Sun is very big and looks like clipart. So here is a bit of math just to proove the dimensions on the photo.

For this purpose I used lens calculator and google.

I took a photo on Nikon D7200 with Nikon 200-500mm, at 500mm, f8.0.
Using google maps I measured my distance from the bridge, and the bridge width. It might be a bit unprecise, but it will do.

Distance from photographer to the bridge top = 1000m
Focal length = 500mm
Nikon crop sensor

If you enter these data into lens calculator, you get the following result for the vertical angle of view:

Vertical FoV = 31.2m

I shot a photo in portrait orientation, so vertical and horizontal axes are swaped basically.

Using a bridge width (14.2m) measured on google maps, and the result from previous step, we can calculate the ratio of the bridge width on the photo like this:

Ratio = 14.2m / 31.2m = 0.45512

If we multiply ratio with the photo width (original, not cropped), we get expected bridge width in pixels on the photo

0.45512 * 4000px = 1820.48

Cool, now let’s measure the bridge on the photo. At first, I was measuring from fence to fence and I got a result that differs about 90px from the calculated value. It could be a measurement error, but then I figured that light poles on the bridge actually goes behind the fence. Doing another measurement, between tops of the light poles, I got a result of 1818px. And that’s, as expected, quite close to the calculated value.

Now let’s use the values for the sun. Google the sun diameter and earth to sun distance, update the values in lens calculator and update the formula:

Sun distance fom Earth = 150.91 million km
Sun diameter = 1.3927 million km

Vertical FoV = 4.71 million km

Ratio = 1.3927 / 4.71 = 0.29569

Expected sun diameter in px = 0.29569 * 4000px = 1182.76
Measured sun diameter = 1171px

It’s about 10px error. Nobody would bother to photoshopt a sun just 10px larger. So there you have. Math proof.

Right time for photography!

This year, the autumn made me fill my memory cards faster than I had time to empty them. Weather conditions in past several weeks in my surrounding (and probably wider) made mornings extremely photogenic.

Waiting for the fish by Aleksandar Beserminji on 500px.com

Nights were cold, days were hot, and that created a lot of fog in the mornings, just above the ground and especially above calm water. While it was raising up, sun rays were coloring it to a golden fire.

All that made me want to wake up in the 4am, enjoy it, and have an adventure every morning. Although, the adventure was actually beginning the evening before, while I was planing where I will go in the morning, while the city is still asleep.

Checking the weather conditions, calculating when and where the sun will rise (suncalc.net) and searching for a location where the sun will potentially align with something interesting, as well as planning how and from which side will I approach the location.

Swan in the morning

When the sun finally goes over the trees and burns all the fog, I was going home with a memory card full of photos. Sometimes I was muddy and wet to my knees, but I was sure I have photos I will like.

Sada je pravo vreme za fotkanje!

Ove godine, jesen je učinila da memorijske kartice u fotoaparatu punim brže nego što imam vremena da ih ispraznim.

Vremenski uslovi kakvi su bili proteklih nedelja u okolini Novog Sada (a verujem i šire), su uticali na to da jutra budu izuetno fotogenična.

Waiting for the fish by Aleksandar Beserminji on 500px.com

Magla, kao posledica toplih dana i hladnih noći, se svakog jutra stvarala blizu tla, a pogotovu iznad mirnih vodenih površina, i polako uzdizala, dok su je sunčevi zraci bojili u zlatno vatrenu boju.

Sve to je učinilo da mi ustajanje u 4h ujutru ne bude problem, već zadovoljstvo, i da mi svaki dan počne sa avanturom. Doduše, svaka avantura je počinjala veče pre, dok sam planirao gde ću se uputiti sutra ujutru, dok grad još uveliko spava.

Proveravanje vremenske prognoze, izračunavanje kada i gde će sunce izaći (suncalc.net) i traženje lokacije gde će se sunce potencijalno poravnati sa nečim interesantnim kao i planiranje kako i sa koje strane prići lokaciji.

Kada se sunce podigne iznad krošnji drveća i spail svu maglu, kući sam se vraćao sa punom karticom fotografija. Ponekad sam bio blatnjav i mokar do kolena, ali sam bio siguran da imam fotografije sa kojoma sam zadovoljan.

go(ing) to Meeting C++

How I got to the Meeting C++ conference?

One morning, while listing through news and warming up for the working day with a cup of coffee, I find this topic on Reddit about Meeting C++ in Berlin. Now, ticket for Meeting C++ isn’t something that I could afford for myself, and my company probably isn’t interested in paying it. So I took a chance and applied for a supportive ticked.

Couple weeks later I got an email from Jens informing me that I got a supportive ticket. Excellent! Instant happiness hit me hard, and I immediately confirm my attendance and reserve the flight and accommodation.

Fast forward week ago, there I am at the opening of the conference. The room full of people, and Jens starts the opening talk. He represents sponsors who did this and that, and that… And as much as that’s not the most interesting part of the conference I heard that there are sponsors who sponsored supportive tickets (aka my ticket). It was Native Instruments and Conan. So this blog is actually a way to say a BIG thank you to the Native Instruments and Conan for supporting my ticket, and an intro to an ongoing series of couple blogs where I will write about some interesting stuff I heard at the conference.

You can check more about the conference here, and check the slides here.

Log execution with GDB

Here is a sequence of commands which may be handy when debugging with GDB. It’s a sequence which allows you to go through the execution and log all the output into a file. And it does that automatically.

set logging file output-file.log
set height 0
set logging on
set logging redirect

while 1
si
end

  • with first command we set a output file where we expect our log after the execution
  • set height sets our screen size, overriding it to 0, so we don’t get messages like this:
    • “—Type <return> to continue, or q <return> to quit—“
  • logging on enables logging
  • and logging redirect doesn’t show output on the screen (which slightly speeds up the process)
  • while loop executes commands inside the loop while the program is running. Instead si, you can use n, ni, s or any other like p or maybe x/i $pc. Just be sure to use at least one command like s or n (which execute), so that you don’t end up with the loop running indefinitely.

Getting started with LLVM

There is actually a really great introduction here: https://llvm.org/docs/GettingStarted.html
And that’s the starting point.

Regardless I’ll explain the checkout and build procedure here in my words, emphasizing things that were unclear to me when I was checking out the Clang/LLVM for the first.

Wyvern, the LLVM logo

Checkout

So first thing is to choose a version control software which you want to use. You can choose between SNV and GIT. Checkout here a bit more on that.
At the moment of writing this text LLVM is using SVN primarily, but there is GIT repo and initiative to move it to GIT primarily (https://llvm.org/docs/Proposals/GitHubMove.html).
Anyway when you decide between SVN and GIT, you can use it to checkout the project. Use following commands in terminal:

git clone https://git.llvm.org/git/llvm.git/ llvm-src

or:

svn co http://llvm.org/svn/llvm-project/llvm/trunk llvm-src

Both commands are going to checkout the project to the folder llvm-src. You need to run only one of them.

Beside LLVM project you’ll probably need to checkout the Clang as well. You can read here more about it: LLVM projects.

Again, type one of these to your console:

git clone https://git.llvm.org/git/clang.git/ llvm-src/tools/clang

or

svn co http://llvm.org/svn/llvm-project/cfe/trunk llvm-src/tools/clang

Now you have clang in your llvm-src/tools directory (just the place it should be).

So from this step, let’s try to build it for your platform (x86 I guess).

Building process

The code you have checked out is a source code. From that code you are gonna build a project into executable binaries. First, create a folder where you want your build to stay. Let’s call it llvm-build, and then enter it.

mkdir llvm-build
cd llvm-build

Now execute following command, with appropriate modification if the path to your llvm-src folder is different.

cmake -DCMAKE_BUILD_TYPE=Debug -DBUILD_SHARED_LIBS=True ../llvm-src

First option ‘-DCMAKE_BUILD_TYPE=Debug‘ means that the project will be built in Debug mode, which will allow you to run it in gdb. If you don’t need it, replace Debug with Release.

Second option ‘-DBUILD_SHARED_LIBS=True‘ means that libraries will not be linked statically, which will result in much faster compilation and the process will be less memory hungry. If you don’t have specific reason to link it differently, use this one, trust me.

The last one i the path to the source folder.

Press enter, and watch how cmake is configuring a build. It might happen that you don’t have some libraries or necessary tools on your system; in that case cmake will result in error. Just install these tools, and then run it again. If you believe that cmake got stuck, and every time you run it, it just doesn’t work for some weird reason, you can also run this command from the llvm-build folder:

rm -rf *

Be careful with this command and take care that you are in the folder llvm-build. Then run cmake again.

Once cmake finishes successfully, hit the following command:

nice make -j6

Now go for coffee break or enjoy watching your llvm building.

Testing if everything is fine

LLVM and Clang come with a bunch of tests that verify that everything works as expected. When some developer implements a new feature, he/she also provides a test for that feature. So when someone else is working on LLVM, they can easily check if they did not break something. These tests are called Regression tests, and they don’t cover all possible functionalities, so if you implement a new feature and none of the tests fail, that does not mean you did a good job. Furthermore, you should think about test you can write that is going to test all cases of your new feature.

Anyway, to run these tests, type the following:

make check

or:

make check-all

You can also type something like this:

make check-llvm-codegen-mips

which will check only llvm, part codegen, and architecture mips. Go and check the tests folder structure to figure out what I am talking about.

When you need to test only one test, not a bunch of them like in previous cases, you can do that with llvm-lit script located under the llvm-build/bin folder. Simply type a llvm-lit and a path to a test you want to run. Example:

./llvm-build/bin/llvm-lit llvm-src/tests/llvm/codegen….

Please note that sometimes developers make mistakes, and freshly checked out Clang/LLVM may have some broken tests. In such situation, just update your local repo and run the build and tests again.

More testing

Beside regression tests, there is also a test suite that you can checkout, build tests and run. But I’ll write more about that in some other posts later.

Student exchange – Åbo Akademi, Finland

At this point, it’s been more than a year since my student exchange at Åbo Akademi in Turku ended. Still, every time I remember some event or talk to my Erasmus friends about some happening, I relive these moments again and again. And every time it feels great!

My story starts somewhere in the middle of my master studies. I got an idea to go somewhere for an exchange. Almost all exchange programs at that moment were closed untill the next year, except EUROWEB+ program. They opened the second round of application. Quickly, I gathered all the necessary documents, wrote biography, motivation letter, etc. and then after more than a month, I got a confirmation that I was accepted. From that moment, things started to happen even quicker: find a best deal for the airplane ticket, apply for visa, apply for a dormitory, prepare everything else… And then finally, the D day arrives: it’s time to fly. Get up early (actually I wasn’t event sleeping that night), catch a bus, catch a plane..

When Finnair finally set down at Helsinki, after a lot of turbulence, I immediately sensed the difference in temperature. I also felt how kind were people who works there at the airport. I caught a bus to Turku, met some other students who arrived here for the same purpose as me, and spent the rest of the ride sleeping.

In Turku, my tutor Ida waited for me and one other girl on the bus station. She walked us to our dormitories and gave us our starting packages. I am not sure if such thing exists elsewhere, but it’s basically a box with some useful items for the room and the kitchen while you are there.

The morning after, we had a introduction course at the faculty. It’s called the orientation course and last for a week. We got all the necessary information there: what is the grading system, how we register for the classes and the exams, things about the health insurance, what do they expect from us and what are our obligations, and many more. During that course, I also changed my learning agreement, because some of the subjects overlapped in the schedule.


So for those who are curious, here are the subjects I have chosen:

  • Advanced computer graphics and graphic hardware
  • Special Course in CS: Distributed systems and algorithms
  • Special Course in CS: Graph Algorithms
  • Special Course in CS: Local Networks
  • Real-Time Systems
  • Evolutionary Algorithms
  • Neural Networks

New thing for me was that some of the classes were not “gradable”, but instead you just get Pass/Fail at the end. No grades/marks.

Also, in Serbia we have semesters where you listen to some courses for the whole semester – for about 4 months. At Åbo Akademi, semesters are divided to two periods and you have different classes each period.

Interesting thing was that we had actual homework there! I haven’t had that since the high school, and it was cool. It was also possible to gain extra points for these homeworks, and it’s even possible to pass some classes just by doing homework. Just to make myself clear, it’s not easy as it sounds.

Before I move on to other aspects of exchange experience, I’d like to single out the Real-Time Systems class, because the professor was outstanding, and the way he presented lectures was very interesting and remarkable and easy to understand, even though the class itself was not that easy.

So now regarding non-academic part, there was everything. Literally. With other exchange students we have been organizing international dinners, were watching movies, traveled together, visited Santa Clause, we drank – we sobered up together. Climbed up to the roofs of some buildings, walked over the frozen sea, we were going to sauna an then ran naked on the snow, fell into 2 meters deep snow, and barely got out. We ran at 3 AM because the sun didn’t go down, laughed, hugged, helped each other, cried when we were going home.. Promised that we will gather again one day and relived that day as those six months behind us. We made many memories which are hard to explain using words, especially to the people outside of that context.

WhatsApp-Image-20160514

Now there are some things I learned about Finland while I was there, to which I was not used to. And these are good things. For example, security in the clubs is not always uneasy and edgy, that people know how to enter the bus on the front door an to pay the ticket, that these same buses don’t have to be smelly and dirty, and that the drivers don’t need to drive them like  a rally. When you miss some document in the bank it’s not a problem, they will fetch it from the university via phone if it’s possible. And if you loose your phone or wallet, they will find a way back to you.

Anyway, for me, this is one of the most valuable experiences in my life till now, and I will probably remember and talk about it forever end ever. And I am really eager and I am looking forward to meeting all these people again one day, some where..

IoT u Petnici

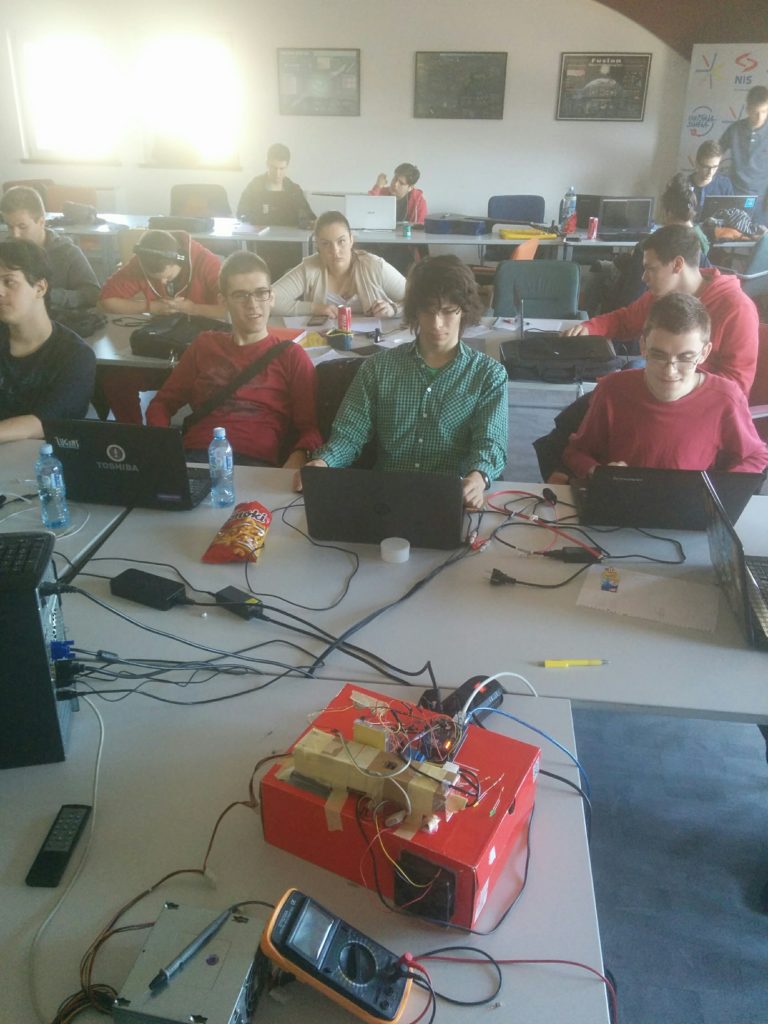
Na jesenjem seminaru računarstva u Petnici, deo pažnje je bio posvećen Internet of Things (IoT) tehnologijama gde su polaznici slušali predavanja na tu temu, ali su mogli i da probaju da kontrolišu jedan model takvog sistema. Deo predavanja je bio posvećen bezbednosti, odnosno rizicima koje IoT tehnologije donose i dešavanjima čiji smo bili svedoci u poslednjih mesec dana.

Pomenuti model je imitacija pametne kuće koja je opremljena senzorima i uređajima koji se mogu udaljeno kontrolisati. Kako je ovo bila prva verzija kuće, model nije imao zavidan dizajn, ali je bio funkcionalan i služio je svrsi 🙂

img_20161120_112735-1

Od senzora/uređaja na/u kući su se našli zvučnik (piezo buzzer), LED sijalice, prozor povezan na micro servo motor, uređaj za ventilaciju/hlađenje (ventilator), uređaj za grejanje (grejač u kombinaciji sa ventilatorom), kao i senzori za merenje vlage, unutrašnje i spoljašnje temperature i temperature uređaja za grejanje. Sve ove komponente su povezane na Arduino Mega 2560, koji preko Ethernet shield-a komunicira sa serverom (koji predstavlja cloud) odakle dobija komande. U normalnim uslovima, kontrola svih uređaja je prepuštena (u ovom slučaju) polaznicima koji šalju komande na server. Izuzetak je uređaj za grejanje, koji je zaštićen od pregrevanja, tako da u slučaju kada dostigne kritičnu temperaturu, kontrolu nad kućom preuzima Arduino i aktivira proceduru hlađenja.

untitled-diagram

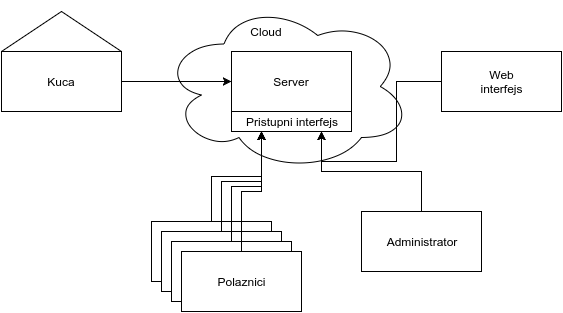
Pored kuće, razvijen je i pomenuti server koji predstavlja posrednika u komunikaciji između polaznika i kuće, ali i koji održava konekciju prema kući i pamti stanja u kojim se kuća nalazi. Server takođe služi i kao neki vid zaštite od ne autorizovane kontrole kuće, kao i zaštita od učestalih slanja komandi. Inače, server je namerno razvijen da ima “rupe” i da omogući polaznicima da probaju da preuzmu kontrolu nad kućom kada to nije omogućeno podešavanjima. Uz ovaj server, razvijen je i server sa korisničkim web interfejsom gde se iz browsera mogu očitavati vrednosti temperature ali i kontrolisati uređaji.

kuca

Polaznici na seminaru su imali niz zadataka:

  • kontrolisanje kuće iz web interfejsa radi održavanja date temperature, ali i izbegavanje pregrevanja,
  • uspostava konekcije sa glavnim serverom i slanje direktnih komandi pod ograničenim privilegijama
  • takmičenje gde dva tima pokušavaju da održe temperaturu koja im je zadata (npr: tim1=27C , tim2=31C),
  • zadatak sličan prethodnom, samo je ovog puta potrebno napisati skriptu koja to sama radi,
  • sprečavanje pregrevanja u situaciji gde je dozvoljena ograničena kontrola kuće,
  • preuzimanje potpune kontrole nad serverom i dobijanje svih privilegija,
  • preuzimanje konekcije između kuće i glavnog servea u cilju sprečavanja/izazivanja pregrevanja


RCBoat got an upgrade: ESP8266

After some time spent trying to bring my IOIO back to life, I decided to move on and to equip my RCBoat with a new controller – ESP8266. It’s a cheap wireless module which became popular very quickly and got a huge community around itself. Because of its price and size it is really easy to use it to connect any device to the Wi-Fi, and to make some cool IoT device out of it. There are also several different firmwares available for it, but maybe the most popular is nodemcu, which allows you to do programming in Lua programming language. Overall, quite pretty module to have for a couple bucks.

Taking all of that into consideration, including my curiosity for the new ESP module, it seemed like a reasonable decision to use it as a controller for my RCBoat. And so it was.

dsc_3751

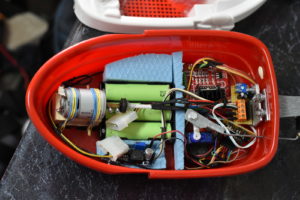
The interior of the boat had to be reorganized, a bit squeezed as ESP8266 requires 3.3V voltage regulator as well, also some mechanical improvements were made, but at the end everything fit nicely.

dsc_3753

ESP8266 is flashed with nodemcu firmware and programmed to behave like an AP (Access Point) which allows me to connect to it using my phone. It is also programmed to receive data and control the rest of the electronics inside the boat. On the phone, I made a Joystick app, which is sending controls to the ESP8266. Both source codes for ESP8266 and the Joystick app for Android are available on my github page.

So after making a nice water sealed package and several successful tests in the bathtub, I’ve made a ride on the canal too. This time there were no connection issues, except when I pushed it quite far away. So now enjoy the video 🙂


Queue monitoring service

Like many other things in Serbia, Student Center of Novi Sad is in some ways old fashioned, and doesn’t like to change how things work. One of things is the way how students apply for the student accommodation and how they pay for it. It’s very simple: you go to the office, you wait and then you apply/pay for the accommodation. No online mess and trouble. Most of the time, waiting time is short, but as deadlines approach, waiting room becomes a bottleneck and many students have to wait, sometimes even for couple hours.

Luckily, the waiting room is equipped with a ticketing machine, so one you get the number, in theory, you can go and do other things you have to do. The problem is that while you are away, you do not know which number is processed in the office, and you can easily miss your turn.

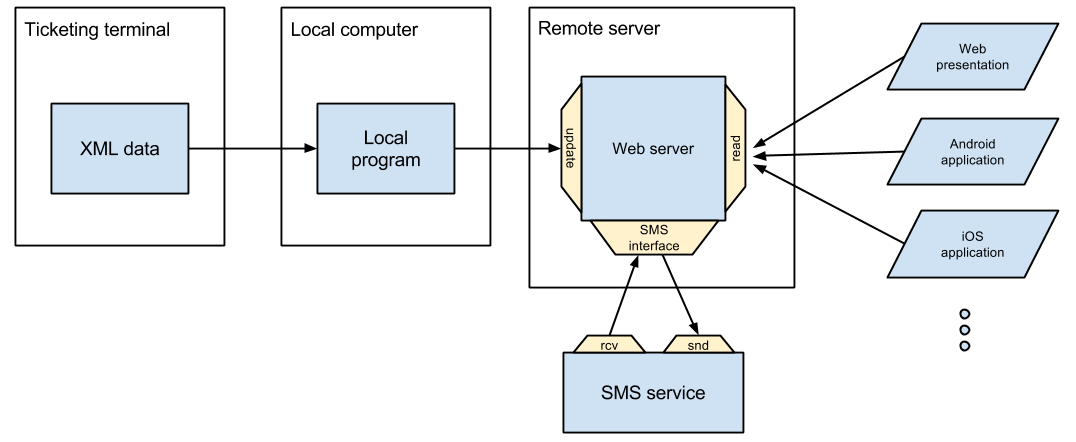
So after some time spent thinking about how could I make things better for us, students, I decided to create queue monitoring service. It would not abolish the queue you saw in the video above, but it will give students a possibility to move away freely without missing their turn. So it led to some investigation in the beginning and system design after, and at the end to some coding ofc. On the diagram below is initial system design, all together with SMS service which was never implemented due some bureaucratic reasons.

System desing

Excluding that, everything else fit well and is working well since it was installed. Ok, maybe not always; sometimes it does happen that local computer stops working, and that service stays outdated for couple hours/days. Right now, the idea is to change ‘local computer’ on this diagram with Raspberry PI, and leave it somewhere in the dark forever alone to do its mission.

pi-forever-alone

Anyway, you can download an app for Android here, or check status online here, but if you are not a student in Novi Sad, then this information might not be useful to you. The thing that might be useful to you is on my github here, and it’s a source code for the local service and Android app. Maybe you can use it and help someone else not to wait in the line for too long 😉